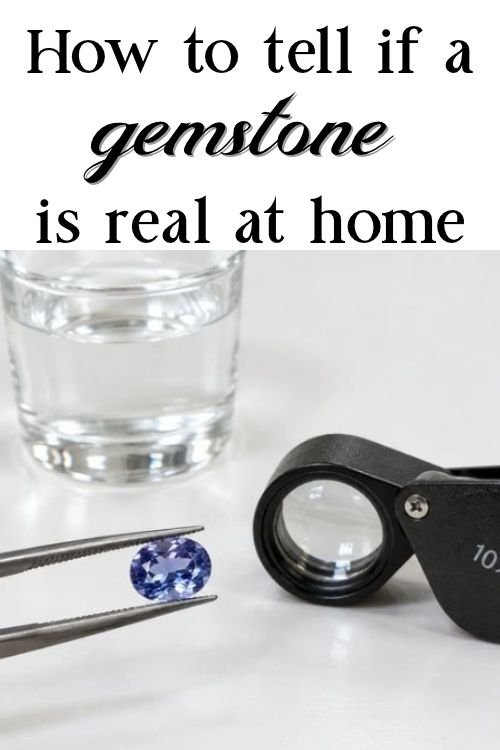
Sooner or later, you’ll be looking at a stone and ask yourself, ‘Is it real?’ It might be one set in a customer’s old ring, a mixed bundle from a car boot sale, or a parcel you’ve just bought online that looked a little too good for the price. Knowing how to tell if a gemstone is real, at least well enough to catch the obvious fakes, is a handy skill for any jeweller.
Proper gem identification takes lab equipment and training. But a few simple checks you can do at home will catch a surprising number of impostors. None of them cost much, and some of them are free.
So let’s explore what these checks can and can’t tell you. Plus whether gemstone identifier apps and tester wands are worth your time and money.
Jump to:
What “real” actually means
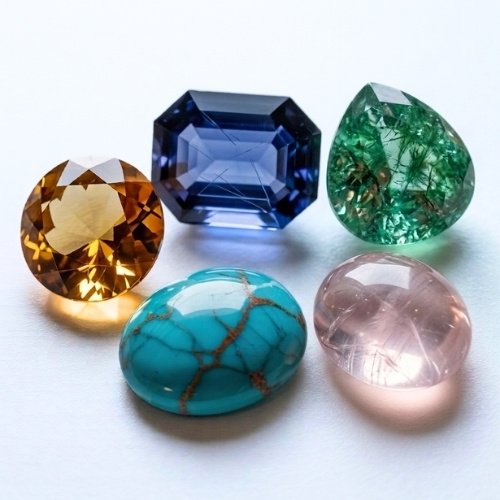
Before reaching for any tools, it helps to know what you’re actually checking for. When people ask if a stone is real, they usually mean ‘is this a natural gemstone?’ They’re looking for a gem that was formed in the earth over millions of years, and anything else feels fake to them.
Natural gems aren’t the only type of real gemstones, though. Lab-grown stones are the same mineral as the natural gem. They have the same chemistry, hardness and optical properties. The only difference is they were grown in a lab instead of underground.
Then there are simulants. Something pretending to be something else. Glass, cubic zirconia, plastic, a cheaper gem passed off as a pricier one, or even just a gem that’s been accidentally misidentified. Doublets and triplets also belong here. They’re layered stones glued together, often with a thin slice of real gem on top. These are the stones that tend to fall into the category of ‘fake’.
Here’s the honest bit. At-home tests can give you a rough indication of whether the gem is real or fake, but they won’t give a positive identification. Keep that in mind and you won’t be disappointed by what these checks can do.
🔗 Want to explain lab-grown stones clearly to customers? Read Lab-Grown vs Natural Gemstones: How to Explain the Difference to Customers
The glass of water check
This one is free, and it’s a great place to start when someone asks how to tell if a stone is real.
Drop a loose stone into a clear glass of water and look at it against a sheet of white paper in good daylight (or backlit if you can). The water cuts down the reflections bouncing off the surface, so you can see inside the stone much more clearly than you can in air.
Here’s what to look for.
- Colour zoning. Natural amethyst and sapphire often show their colour in bands or patches. In natural stones these bands tend to be straight or angular, following the way the crystal grew.
- Curved bands. Curved colour bands or curved growth lines are a classic sign of flame-fused lab-grown ruby and sapphire. Nature grows crystals in straight lines, so curves are a big clue.
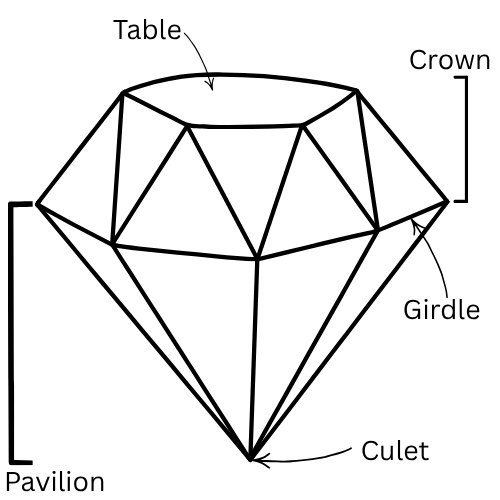
- Colour doesn’t go through the whole gem. Look at the stone from the side. If all the colour sits in a thin layer near the top and the rest is pale or colourless, or if there is a colourless band near the girdle, you may be looking at a doublet.
- Bubbles. Round bubbles, on their own or in strings, usually point to glass.
A couple of important warnings. Never put opal in water. Opal can absorb water, and changes in moisture can cause it to craze, which means a network of fine cracks that can’t be undone. I’d also skip porous stones like turquoise, pearl and lapis lazuli, and anything you suspect is dyed. Emeralds are very often oiled to hide cracks, so they’re best kept out of the glass too. Stick to loose stones for this glass test, and dry them well afterwards.
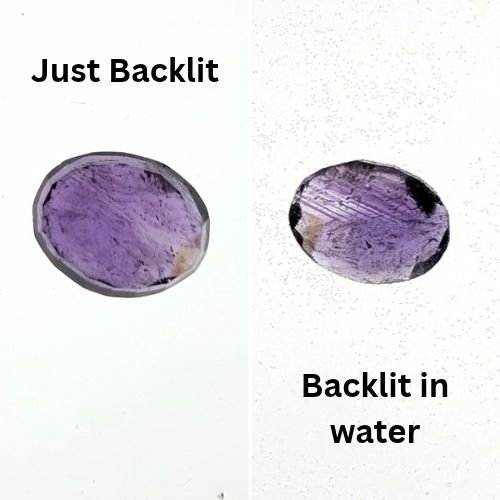
Here is an example of an amethyst that’s simply been backlit on the left and backlit while in a glass of water on the right. As you can see, you get a far sharper view of the gem, even being able to clearly see the straight colour zone lines when it’s sitting in the water.
Going further with cinnamon bark oil
Water is free and simple, but it has one weakness. Its refractive index, or RI, is only about 1.33, much lower than most gems. RI is simply how much a material bends light. The closer a liquid’s RI is to the gem’s, the more the stone seems to melt into it. The outline softens, the surface reflections fade, and it starts to look a bit like a blob of jelly. That’s when you can see inside it best.
Gemmologists use RI liquids with a much closer match, but many of them are toxic to breathe in and not something I’d recommend keeping at home. My alternative is cinnamon bark oil. It has an RI of about 1.57 to 1.60, depending on the batch. That’s not a perfect match for higher RI gems like sapphire and ruby, but it gives you a much clearer view than water. It also smells far nicer than chemicals. If you want to get yourself a bottle, make sure it’s cinnamon bark and not cinnamon leaf, as leaf oil has a lower RI.
It’s particularly handy for spotting a couple of common corundum (sapphire & ruby) treatments.
Beryllium diffusion. This treatment adds colour to sapphires from the outside in. In oil, you may see the colour concentrated near the surface, while the centre looks paler or even a different colour.
Fracture filling. Cracks filled with glass or resin stand out more clearly in oil, because the filler doesn’t have the same RI as the gem. This is especially useful for glass-filled rubies. Although I would note it won’t always catch them, so looking ok in oil doesn’t guarantee it’s not glass-filled.
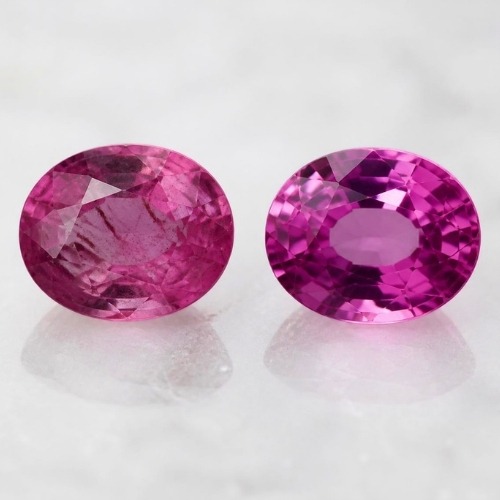
Here is an image of three small corundums simply backlit, and backlit in cinnamon bark oil. Although the colour doesn’t look quite right when they’re just backlit, it’s far easier to see these stones have been treated when you submerge them in the oil.
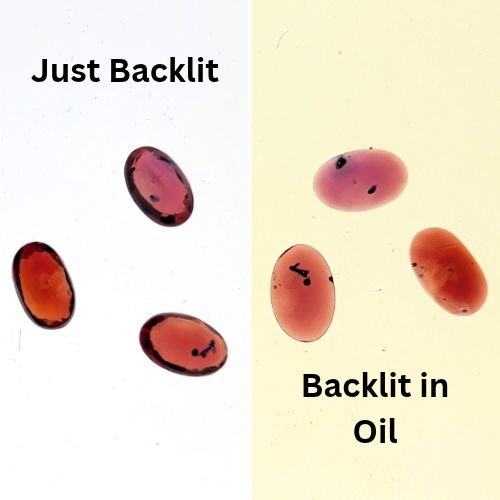
A few sensible precautions, just to be on the safe side. Wear gloves, as cinnamon bark oil can irritate skin. Work in a well-ventilated room, use a small glass dish that never goes back in the kitchen, and keep it away from children and pets. Wash the stone in warm soapy water afterwards. The same skip list applies as for water, so no opal, porous stones or oiled emeralds. The oil is also quite a dark yellow, so expect a slight tint to the view.
If you only check the odd stone, water is still the easiest option, as there’s no health and safety to worry about. But if you buy a lot of gems, especially sapphires and rubies, a bottle of cinnamon bark oil is well worth having. I go into immersion in more detail in my identification post, linked towards the end of this post.
What a 10x loupe will show you
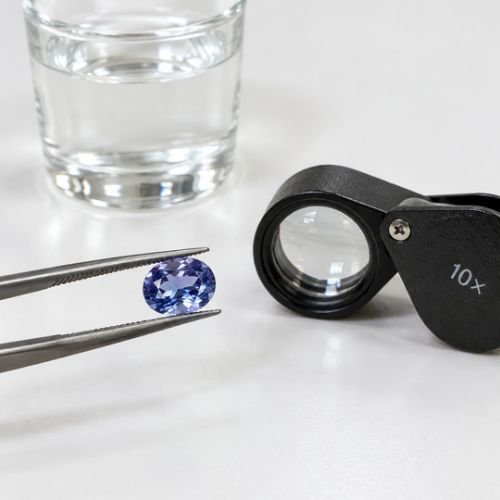
A 10x loupe is a small folding magnifier, and it’s the tool every jeweller should have in their pocket. Hold it close to your eye (usually about 1 inch away), then bring the stone up towards it until it’s in focus.
Here’s what it can show you.
- Gas bubbles and swirls. Round bubbles and swirly flow lines are typical of glass.
- Worn or rounded facet edges. Glass is softer than most gems, around 5 to 6 on the Mohs scale, so its facet edges scuff and chip easily. Moulded glass can also have rounded edges and slightly concave facets (instead of being flat, the faceted surface dips inwards slightly), as it was pressed in a mould instead of being cut.
- Natural inclusions. Tiny crystals, fingerprint-like patterns, fine needles (called silk in ruby and sapphire), and the mossy “jardin” inside emerald. These are good signs of a natural stone, but not proof. Some lab-grown stones, especially flux-grown ones, have fingerprint-like inclusions too.
- Doubled facet edges. Look through the top of the stone at the back facets. In some gems, like zircon and peridot, the back edges look doubled, a bit like seeing double after a long day. That’s strong double refraction at work. Cubic zirconia (CZ) never does this, which makes it a great quick test for zircon vs CZ.
- A join line. A doublet may show a flat line around its middle, often with flattened bubbles trapped in the glue.
One more tip. A stone that looks totally flawless and came cheap deserves a second look. Perfection is common in glass, CZ and lab-grown stones, and rare in nature.
Two more quick checks you can do anywhere
These two need no tools at all. They’re very rough, but handy at a car boot sale or a craft fair.
The touch test
Gemstones feel cool when you first touch them, because they draw heat away from your skin. Plastic feels warm almost straight away. Your lip or cheek is the most sensitive spot for this, so wipe the stone first. And try it quickly, before the stone has had the time to warm up in your hand.
The catch is that glass & cubic zirconia feel cool too. So this test is really good for catching plastic.
The breath test
If the stone is big enough, breathe on it the way you would to clean your glasses, and watch the fog. On most actual gemstones, the fog clears very quickly. On glass it tends to hang around a little longer.
The differences can be small, so it works best on a clean, dry stone, side by side with a piece of glass of a similar size. Like the touch test, it can hint that something is glass, but it can’t tell you what a gem actually is.
Tools worth buying
For a gemmologist, the most useful tool is a refractometer. It measures a gem’s refractive index, among other things, which goes a long way towards identifying it. But it takes practice to use well, and it needs refractive index fluid, which you’ll need to keep buying.
So if you’re keen to learn and don’t mind the ongoing cost, a refractometer is well worth having. But if you’d like something small and easy to use, mainly to rule out glass and cubic zirconia, get a portable polariscope. I say portable, not to save space, but to save cost. They’re cheaper than the bigger versions and surprisingly useful once you know what they’re telling you.
It’s made of two polarising filters with a light underneath. With some models, you need to turn the top filter until the view goes dark. With others, like the one I use from GIA, the lenses are fixed, which makes it even easier to use. Once set up, you simply rotate the gemstone a full 360° between the filters and watch to see what happens.
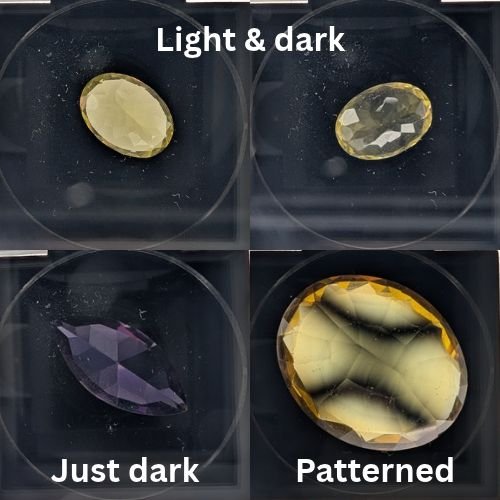
If it blinks light and dark, the stone is more than likely* doubly refractive. It should blink four times in a full turn. That rules out glass and cubic zirconia, which are both singly refractive and the most common imitation stones.
If it stays dark, the stone is singly refractive. That could mean glass or CZ, but it could just as easily be garnet, spinel or diamond, which are all singly refractive too. So a dark result only proves an imitation if the gem you thought you purchased is a doubly refractive one.
If it has a pattern, this too is an indication of a singly refractive gemstone.
If it stays light the whole way round, it may be a polycrystalline or aggregate gemstone, such as chalcedony.
*Strain inside glass can sometimes fool a polariscope, making it show what looks like a light and dark blink. Garnet can occasionally do this too, and it’s known as anomalous double refraction (ADR).
Remember, a polariscope can’t tell you what the gem is, and it can’t tell natural from lab-grown. A lab-grown sapphire blinks just like a natural one. So think of it as a way of ruling things out, not positively identifying them. It works best on transparent, loose stones. Very dark or heavily included stones are much harder to read.
What about gemstone tester wands?
Tester wands, the pen-style gadgets with a metal tip, usually test a stone’s thermal conductivity. That’s simply how quickly it draws heat away from the tip.
Diamond testers. Diamond conducts heat extremely well, so it stands out clearly from glass and CZ. These testers can be quite affordable, so if you buy diamonds, one can be a handy tool. There are a couple of catches, though.
The first is moissanite, a lab-made diamond lookalike. It conducts heat almost as well as diamond, so a basic thermal tester will usually call it a diamond. Many newer testers do an electrical test too, to tell the two apart, as moissanite conducts electricity and most diamonds don’t.
The second is accuracy. Even the best testers on the market won’t be right every time, and there’s no way of knowing which results are false positives or false negatives.
Coloured gem testers are handy for an idea of what a stone might be. But there’s a lot of overlap in their readings, so they sort stones into broad groups instead of naming them. They also tend to have quite limited databases, so they won’t know anything about rarer gems. Like diamond testers, they have their place. If you buy a lot of loose coloured gemstones, one can be worth the investment as a quick check on how likely it is that a gem is what the seller said it was.
So a tester wand is a useful extra clue, but it shouldn’t be relied on as proof of what a stone is.
Are gemstone identifier apps accurate?
Photo ID apps are tempting. Snap a picture, get an answer. Sadly, they’re not reliable.
A gemstone identifier app is mostly guessing from colour and shape, and colour is one of the least useful clues there is. A red stone could be ruby, spinel, garnet, red glass or lab-grown ruby. They can look almost identical in a photo. The app can’t see inside the stone, can’t measure how it bends light, and has no way to tell natural from lab-grown.
They can be fun for a rough guess, but I would never suggest using one to decide what to sell a gemstone as.
A check to skip
One home test you’ll find mentioned a fair amount online is the scratch test. Knowing a stone’s hardness is mildly helpful at best when it comes to identifying it, and it also permanently damages it. Please don’t do this to cut stones.
Test summary table
| Check | Cost | Good at catching |
|---|---|---|
| Glass of water | Free | Doublets, curved banding, bubbles |
| Cinnamon bark oil | Low | Beryllium diffusion, fracture filling, a clearer look inside |
| 10x loupe | Low | Glass, CZ vs zircon, doublets, natural inclusions |
| Touch test | Free | Plastic |
| Breath test | Free | Glass |
| Portable polariscope | Low to moderate | Ruling out glass and CZ |
| Tester wand | Moderate | Diamond vs glass or CZ and gives a rough idea of what a coloured stone could be |
How do you know for certain if a gemstone is real?
Honestly, you can’t with home checks alone. They’re brilliant for spotting glass, CZ and doublets, and for deciding which stones deserve a closer look. But to name a gem and confirm whether it’s natural, you need proper gemmological testing. That means measuring refractive index, checking how the stone reacts to light, and examining it under a microscope.
🔗 If you’d like to know how a gemmologist actually goes about testing gemstones, I’ve written up my full process here: Gemstone Identification: How I Actually Test Gemstones
🔗 Want to reduce your chances of buying a fake gemstone online? Read How to Spot Misleading Gemstone Listings
🛍️ Looking for pre-owned gemstones for your next project? Explore our selection
📌 Don’t forget to save this guide to checking if a gemstone is real so you can find it again!